简单集群控制
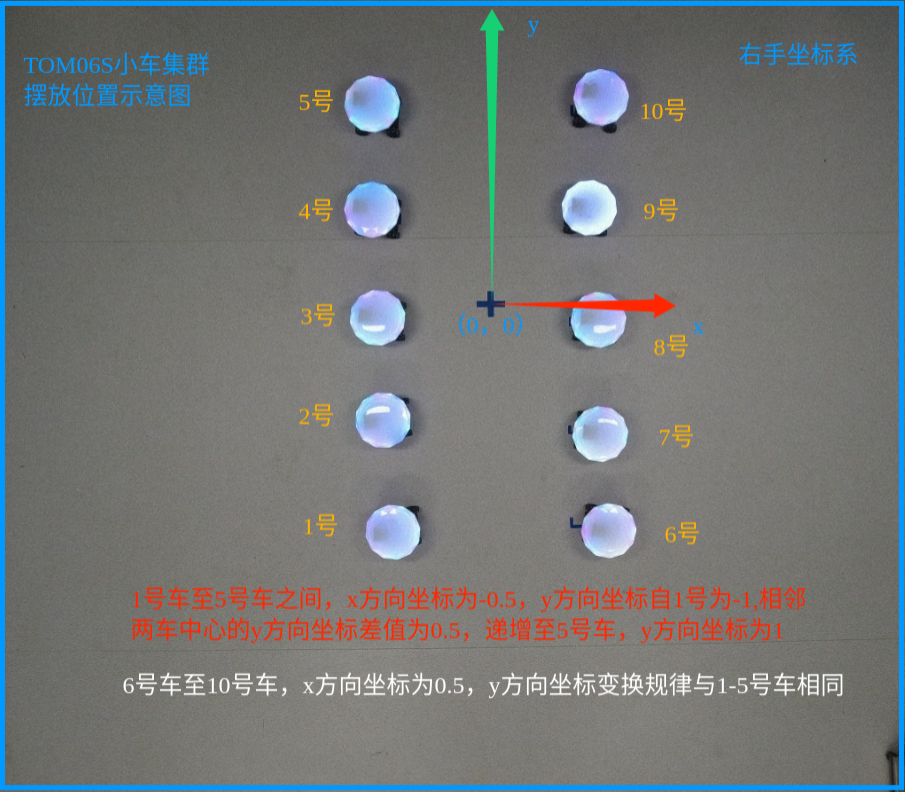
以 10 台TOM06S为例,为了设定小车初始位置,我们可以按下图方式进行摆放
提示
- 摆放时,建议将小车车头方向(小车
x方向)与 world 坐标系x轴方向对齐。 - 请确保小车之间的间距大于 1 米,否则可能会导致小车之间碰撞。
然后,给所有小车上电。登录路由器后台,确保 10 台小车均已连接到路由器上。
无world参考系
使用rqt查看
TF 树

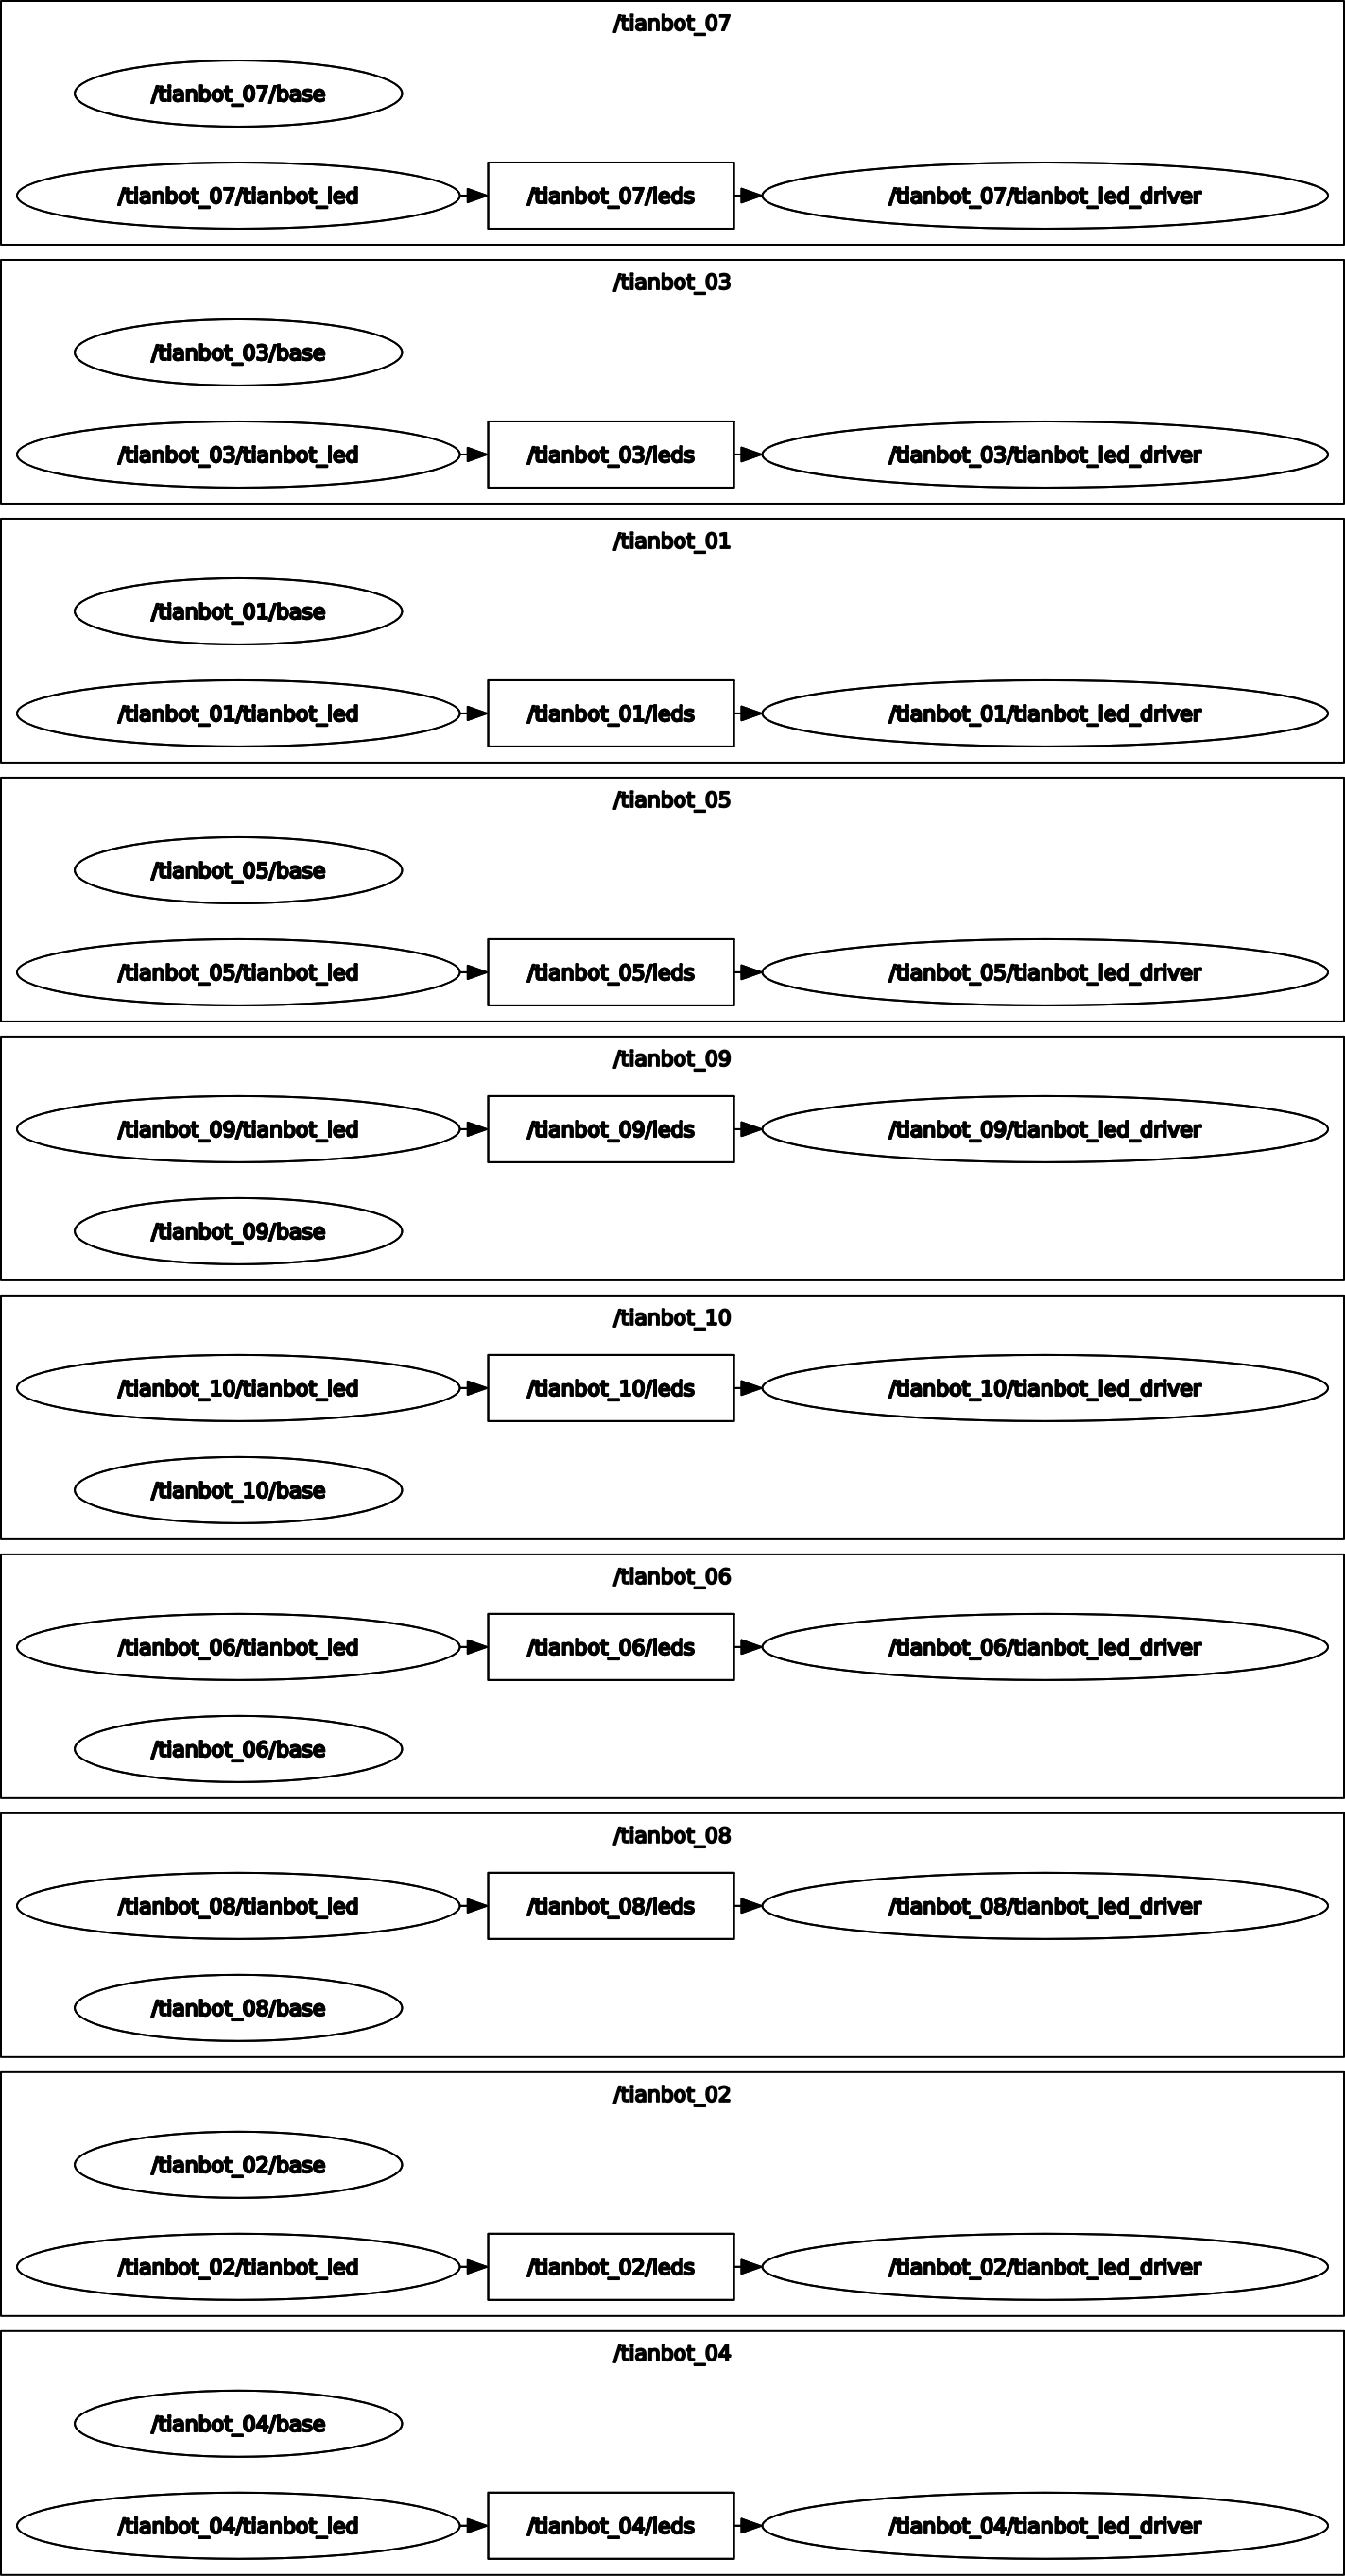
可以看到目前小车之间并不确定坐标系的变换关系,所以接下来,我们通过TF静态变化手动给定这个坐标系变换关系
Node Graph
有world参考系
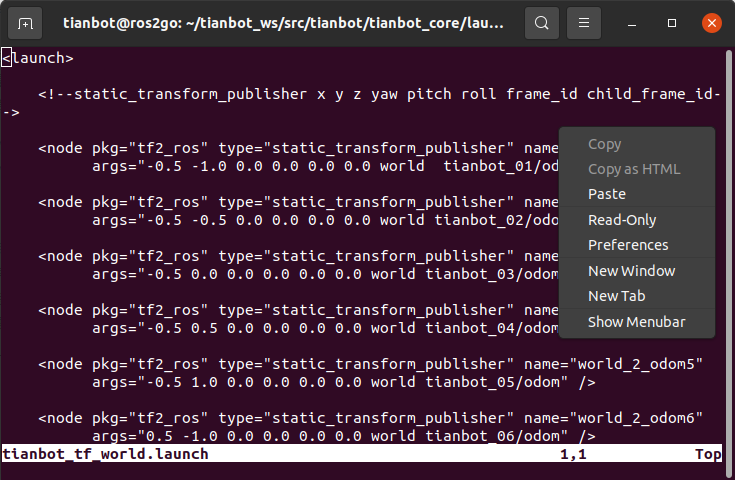
打开一个终端,运行如下 命令切换到tianbot_core/launch目录下,然后创建并编辑tianbot_tf_world.launch文件
bash
tianbot@ros2go:~$ roscd tianbot_core/launch && vi tianbot_tf_world.launchtianbot_tf_world.launch
xml
<launch>

    <!--static_transform_publisher x y z yaw pitch roll frame_id child_frame_id-->

    <node pkg="tf2_ros" type="static_transform_publisher" name="world_2_odom1"
          args="-0.5 -1.0 0.0 0.0 0.0 0.0 world  tianbot_01/odom" />

    <node pkg="tf2_ros" type="static_transform_publisher" name="world_2_odom2"
          args="-0.5 -0.5 0.0 0.0 0.0 0.0 world tianbot_02/odom" />

    <node pkg="tf2_ros" type="static_transform_publisher" name="world_2_odom3"
          args="-0.5 0.0 0.0 0.0 0.0 0.0 world tianbot_03/odom" />

    <node pkg="tf2_ros" type="static_transform_publisher" name="world_2_odom4"
          args="-0.5 0.5 0.0 0.0 0.0 0.0 world tianbot_04/odom" />

    <node pkg="tf2_ros" type="static_transform_publisher" name="world_2_odom5"
          args="-0.5 1.0 0.0 0.0 0.0 0.0 world tianbot_05/odom" />

    <node pkg="tf2_ros" type="static_transform_publisher" name="world_2_odom6"
          args="0.5 -1.0 0.0 0.0 0.0 0.0 world tianbot_06/odom" />

    <node pkg="tf2_ros" type="static_transform_publisher" name="world_2_odom7"
          args="0.5 -0.5 0.0 0.0 0.0 0.0 world tianbot_07/odom" />

    <node pkg="tf2_ros" type="static_transform_publisher" name="world_2_odom8"
          args="0.5 0.0 0.0 0.0 0.0 0.0 world tianbot_08/odom" />

    <node pkg="tf2_ros" type="static_transform_publisher" name="world_2_odom9"
          args="0.5 0.5 0.0 0.0 0.0 0.0 world tianbot_09/odom" />

    <node pkg="tf2_ros" type="static_transform_publisher" name="world_2_odom10"
          args="0.5 1.0 0.0 0.0 0.0 0.0 world tianbot_10/odom" />

</launch>复制上述代码,在终端选区内鼠标右键点击粘贴即可,按下ESC键,输入:wq保存并退出
然后输入如下命令运行即可
bash
tianbot@ros2go:~$ roslaunch tianbot_core tianbot_tf_world.launchTF 树
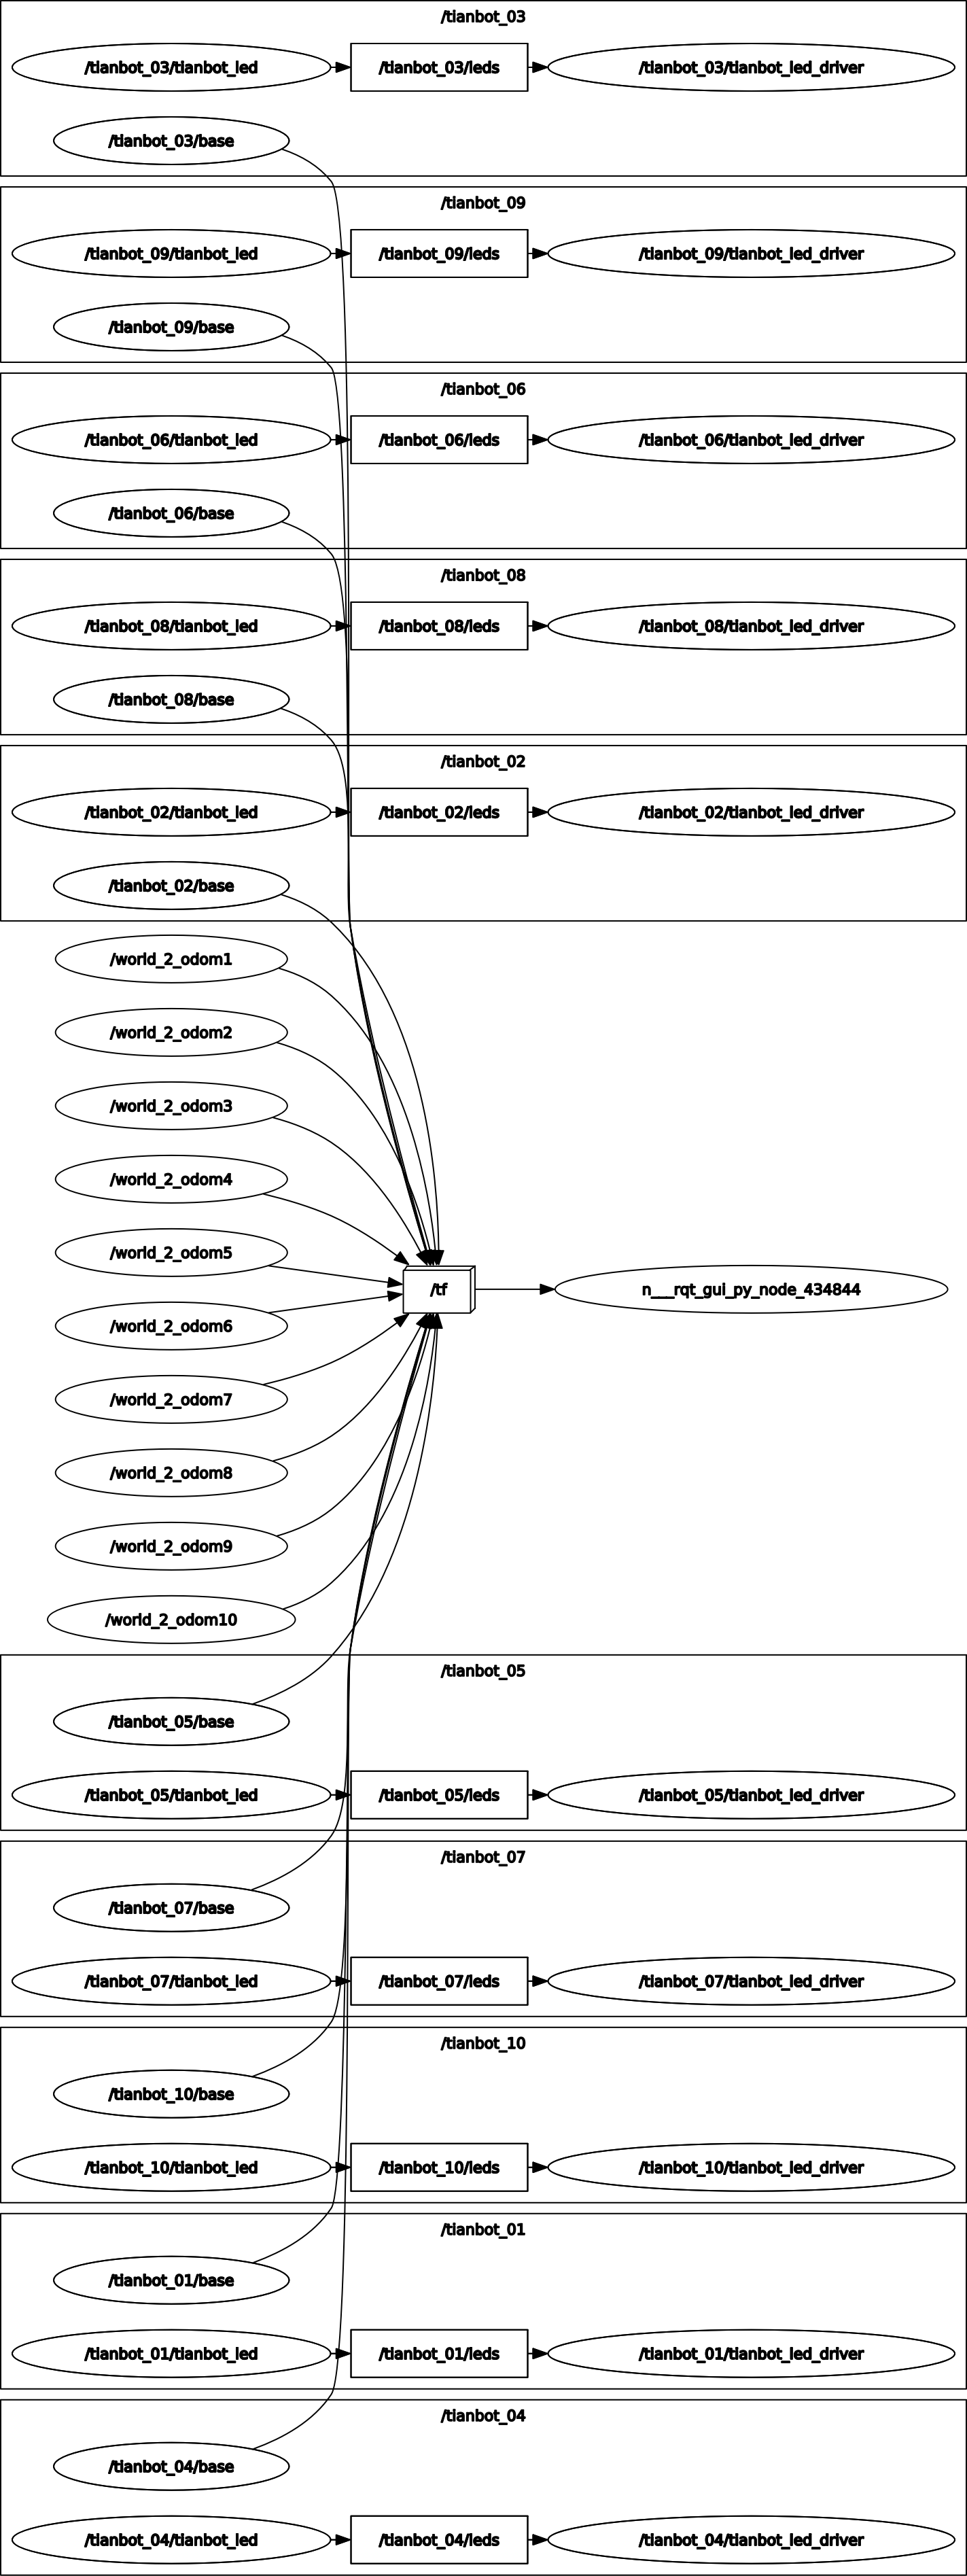
此时刷新后再次查看TF树,成功拥有共同父参考坐标系world

Node Graph
tianbot_test.py
该脚本通过订阅teleop_twist_keyboard发布的cmd_vel话题进行Twist消息的转发。
python
import rospy
from geometry_msgs.msg import Twist

def teleop_callback(msg):
    global publishers
    for i, publisher in enumerate(publishers):
        publisher.publish(msg)

if __name__ == '__main__':
    # Get number of topics from user
    try:
        num = int(input('Enter number of topics: '))
    except ValueError:
        num = 0
    if num == 0:
        rospy.info('Invalid input. Please enter a valid numble.')
    else:
        # Initialize ROS node
        rospy.init_node('control_command_publisher')

        subscribler = rospy.Subscriber("/cmd_vel", Twist, teleop_callback)

        # Create publishers for each topic
        publishers = []
        for i in range(num):
            topic_name = f'tianbot_{i+1:02d}/cmd_vel'
            publisher = rospy.Publisher(topic_name, Twist, queue_size=1)
            publishers.append(publisher)
            rospy.loginfo(f'Published control command to topic {topic_name}')

        rospy.spin()
使用方法
新开一个终端,运行tianbot_test.py脚本,然后根据提示输入需要发布话题的个数,以 10 台TOM06S为例,输入10即可,然后按下回车键
bash
tianbot@ros2go:~$ python3 tianbot_test.py再新开一个终端,运行键盘控制节点
bash
tianbot@ros2go:~$ rosrun teleop_twist_keyboard teleop_twist_keyboard.py根据提示信息,对于TOM06S这样一款全向底盘,我们按下键盘的大写锁定键,使用Holonomic mode模式来控制,根据终端提示,进行控制,此时J、L键为左右平移
bash
msg = """
Reading from the keyboard  and Publishing to Twist!
---------------------------
Moving around:
   u    i    o
   j    k    l
   m    ,    .

For Holonomic mode (strafing), hold down the shift key:
---------------------------
   U    I    O
   J    K    L
   M    <    >

t : up (+z)
b : down (-z)

anything else : stop

q/z : increase/decrease max speeds by 10%
w/x : increase/decrease only linear speed by 10%
e/c : increase/decrease only angular speed by 10%

CTRL-C to quit
"""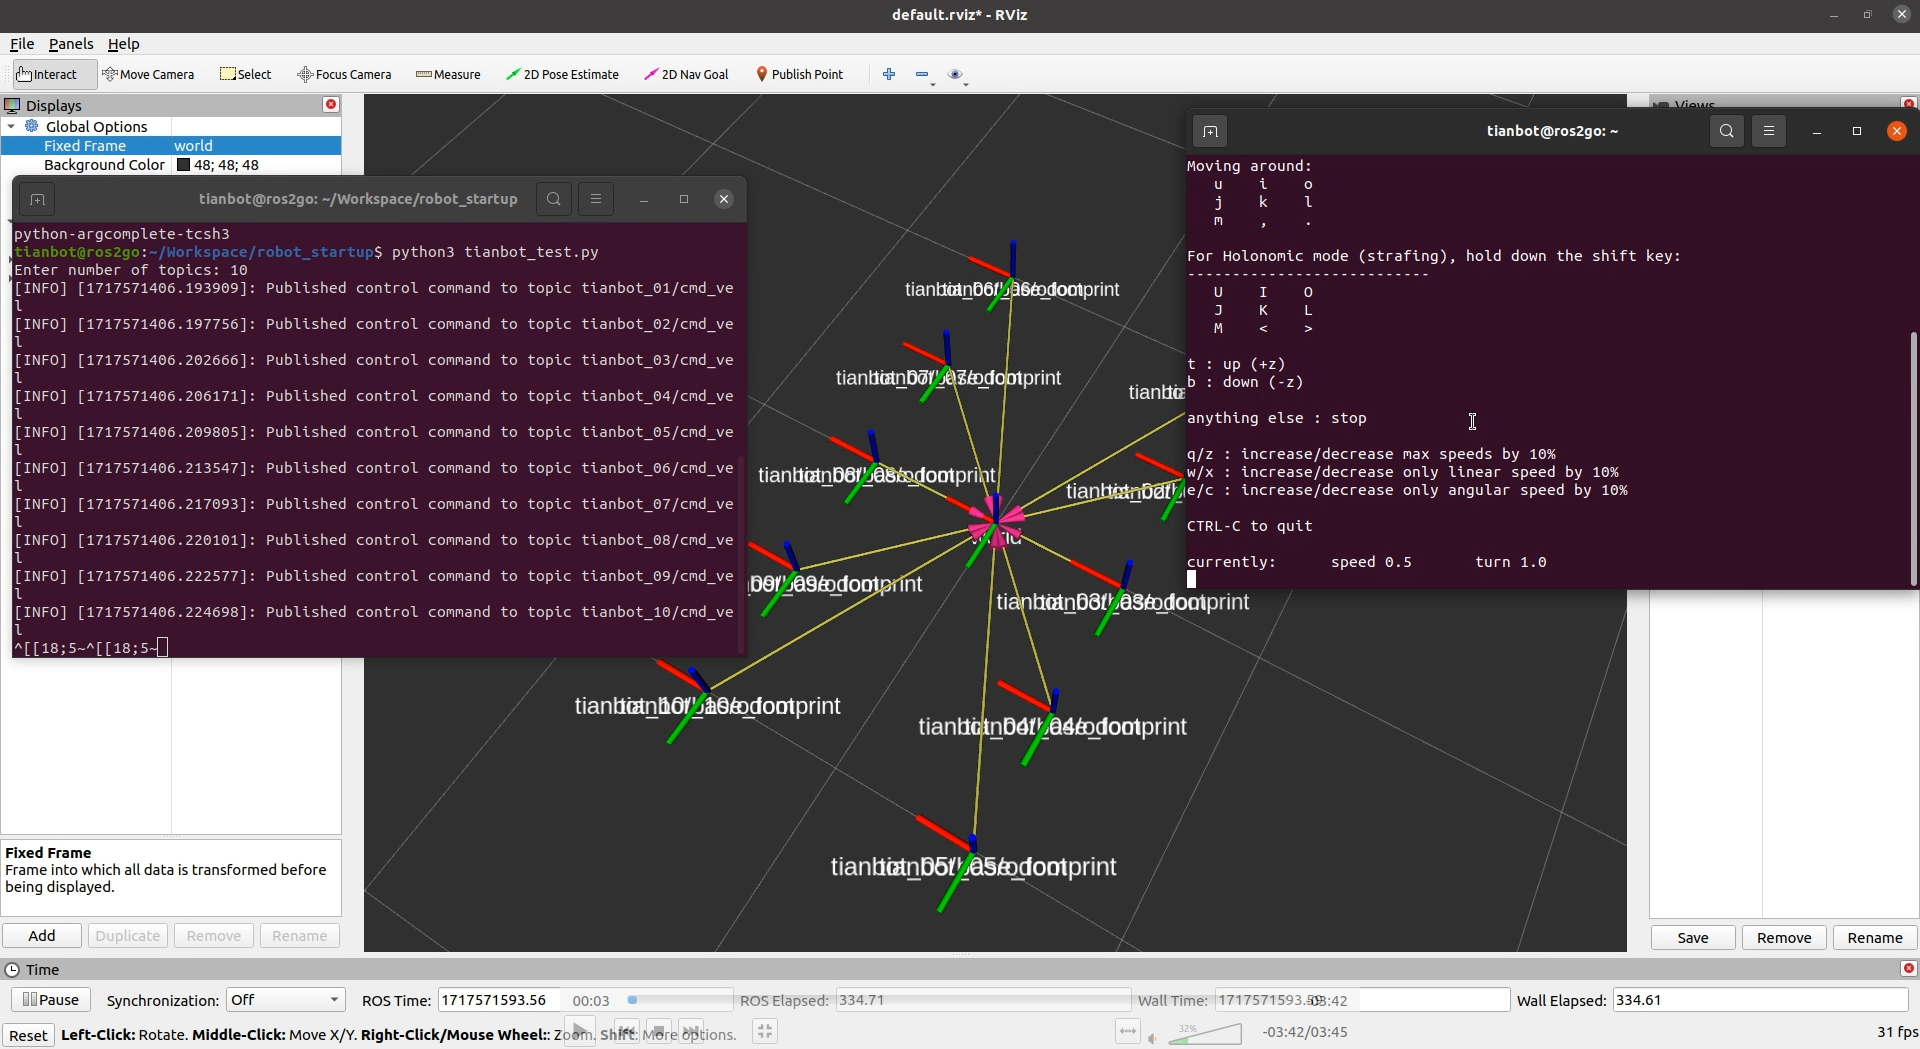
使用rviz工具,然后修改Fixed Frame为world,并添加TF插件,配置后显示下图状态即可
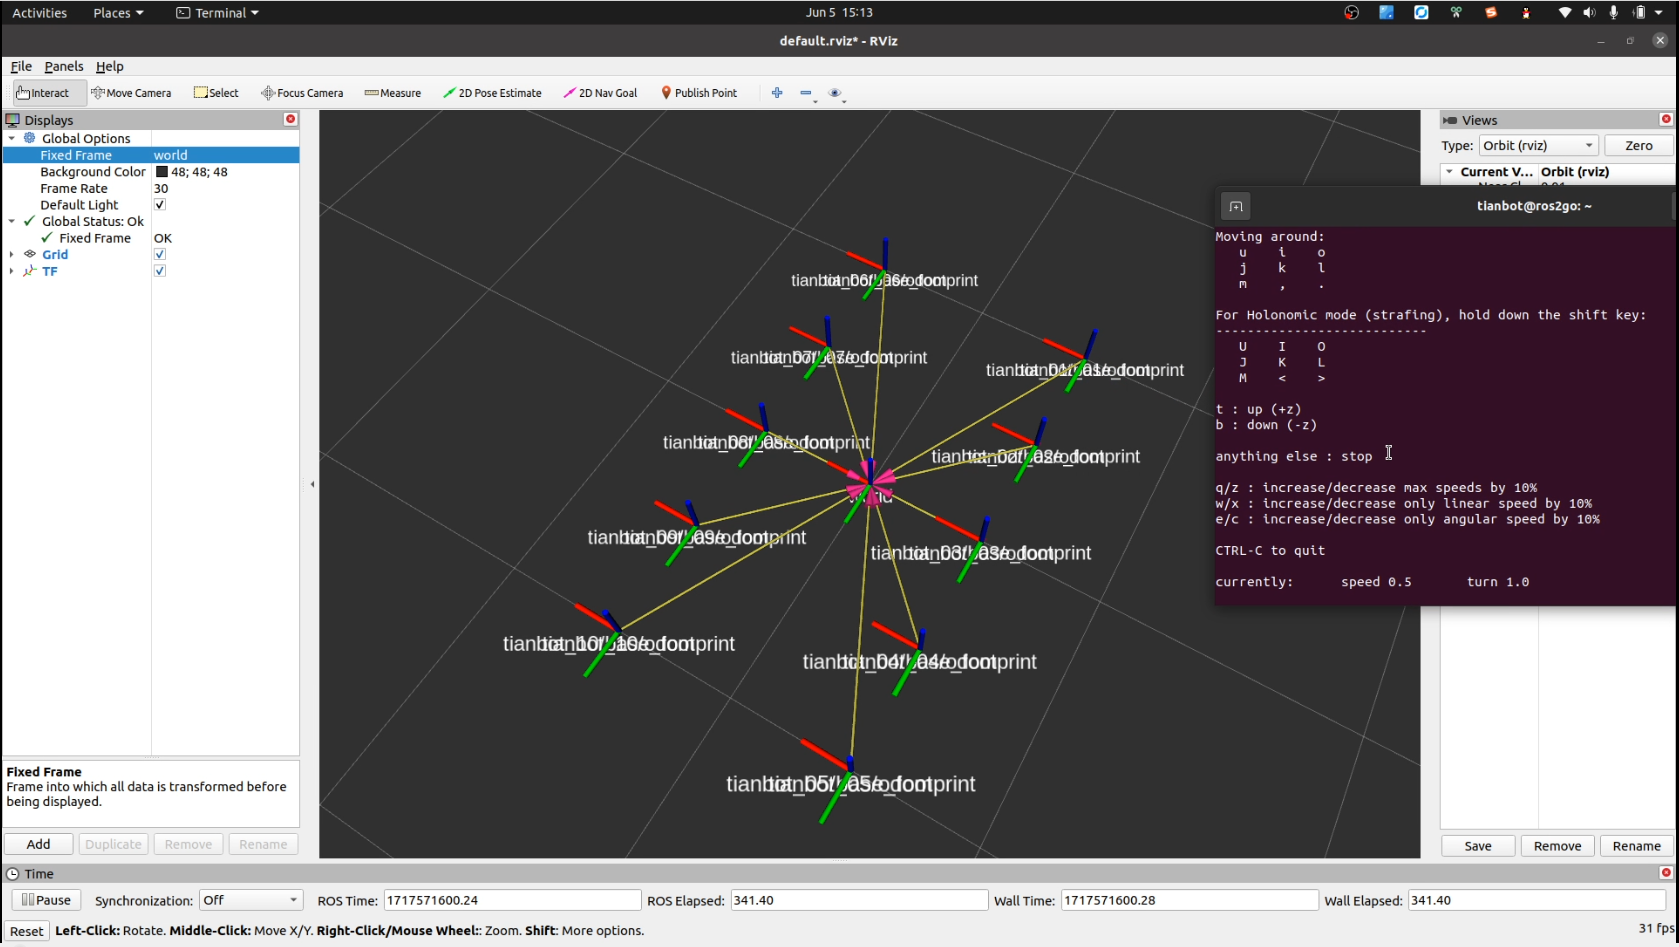
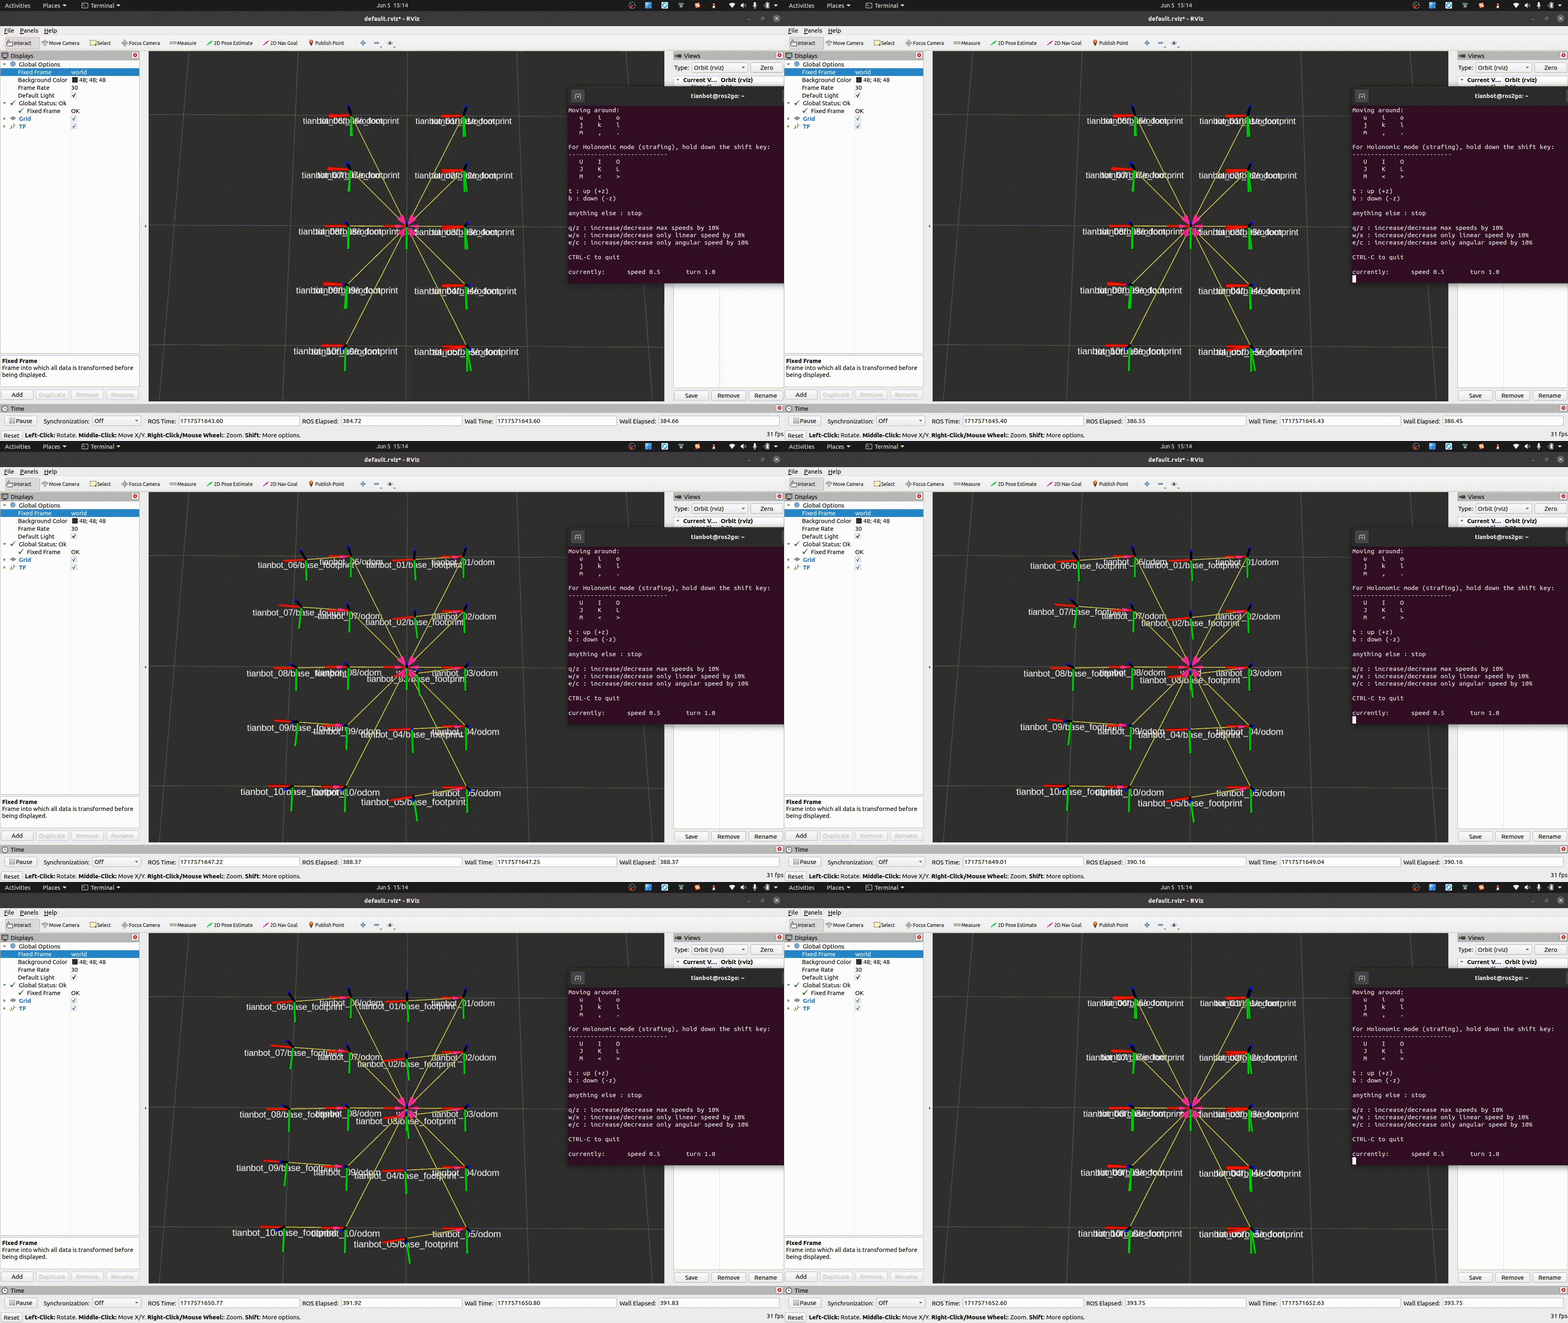
此时通过键盘控制终端就可以对 10 台TOM06S进行简单阵型的集群控制了
TF 树变化
实车运行
